1966Cadillac (1/24) Assembly instructions
●This instructions is due to automatic translation.
●Although some incomplete translation, please understand.
※ In the illustration below, the margin has been omitted. Please note.
①
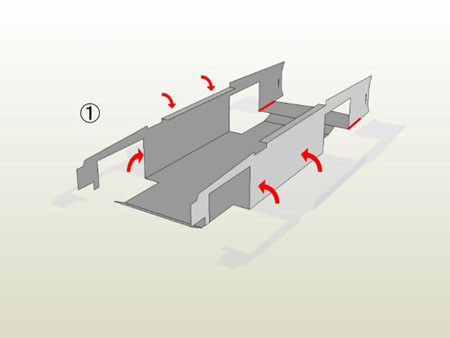
"A ① parts" to assemble. This part is reinforced on both sides of the chassis and body.
![](https://image.jimcdn.com/app/cms/image/transf/none/path/sa71bc8f6ede33afe/image/i44bed4a8527a55d5/version/1307261322/image.jpg)
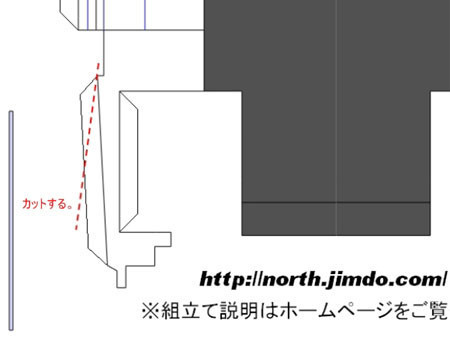
[Supplemental explanation]
The portion shown in the diagram above, makes a mess when installing the hood. As shown by the dotted line, please cut.
②
![66Cad_Inst②](https://image.jimcdn.com/app/cms/image/transf/none/path/sa71bc8f6ede33afe/image/i404ae71db8177679/version/1307261585/66cad-inst%E2%91%A1.jpg)
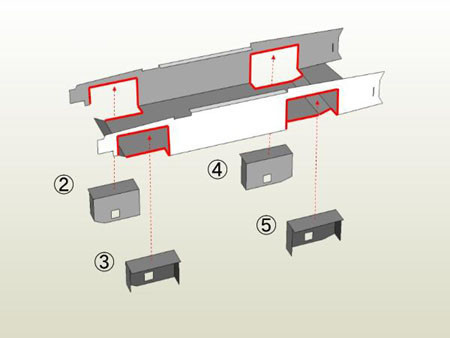
Assemble the tire housing.
③
![66Cad_Inst③](https://image.jimcdn.com/app/cms/image/transf/none/path/sa71bc8f6ede33afe/image/i5a4895fec1e44199/version/1307261788/66cad-inst%E2%91%A2.jpg)
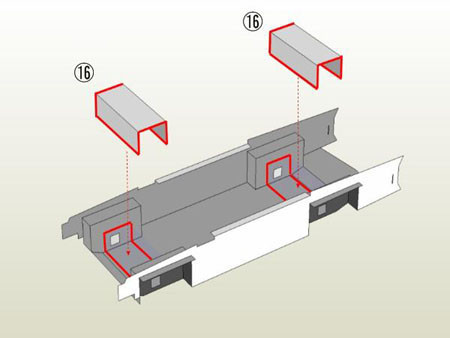
"A ⑯" glue. The reinforcement between the tire housing.
④
![](https://image.jimcdn.com/app/cms/image/transf/none/path/sa71bc8f6ede33afe/image/ib5559866cef177a2/version/1307261967/image.jpg)
Glue the parts in place.
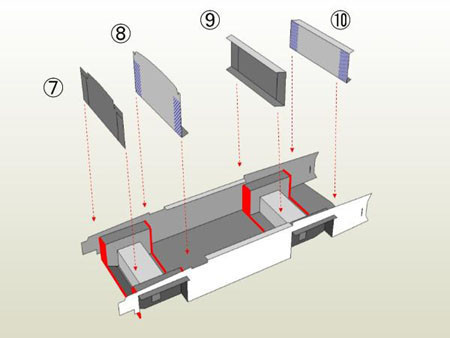
⑤
![66Cad_Inst⑤](https://image.jimcdn.com/app/cms/image/transf/none/path/sa71bc8f6ede33afe/image/i893522519a928573/version/1307262171/66cad-inst%E2%91%A4.jpg)
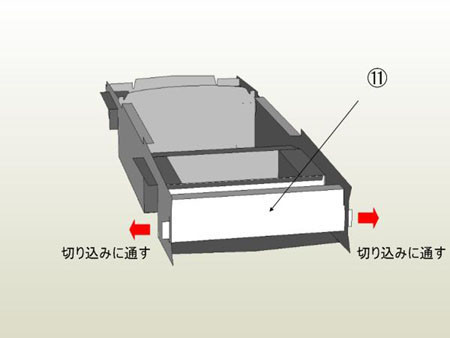
On both sides of the cut, insert a ⑪, and glue.